Deploying Laravel to Hostinger VPS: The Complete Production DevOps Guide
A complete, battle-tested DevOps roadmap for deploying production-grade Laravel applications on Hostinger VPS using Docker, Nginx reverse proxy, Let's Encrypt SSL, Redis, and automated zero-downtime deployment scripts.

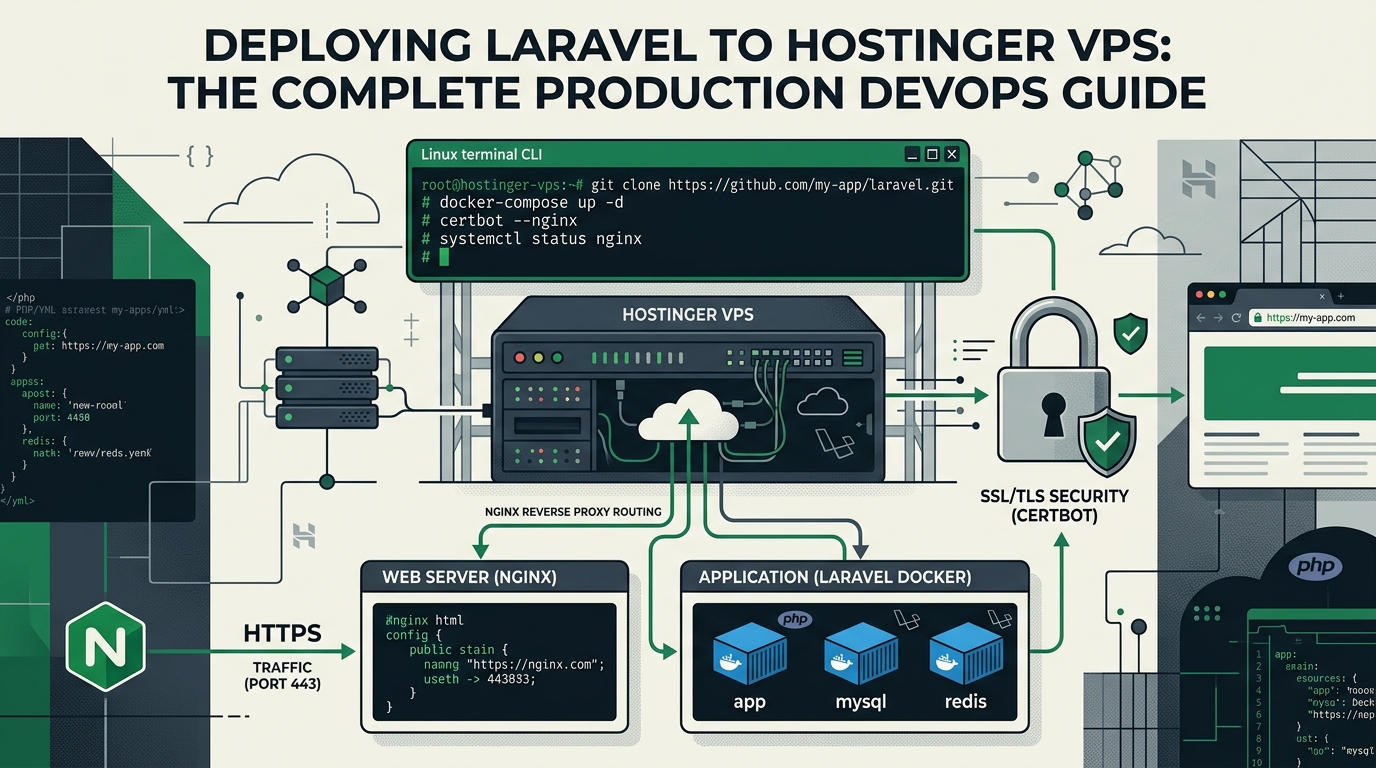
Deploying modern Laravel applications to production shouldn't be an exercise in guesswork. While managed platform-as-a-service (PaaS) providers offer quick convenience, deploying to a Hostinger VPS gives you dedicated compute power, predictable monthly billing, unmetered network bandwidth, and complete architectural sovereignty over your infrastructure.
In this guide, we walk through an end-to-end, zero-downtime DevOps pipeline for running Laravel 11/12 applications on a Hostinger KVM VPS using Docker, Nginx, Redis 7, Let's Encrypt SSL, and automated deployment scripts.

High-Level Architecture Overview
Before touching the terminal, let's visualize the production request lifecycle:
- DNS & Edge: Cloudflare / Domain Registrar points
yourdomain.comandwwwA records to your Hostinger VPS static IPv4. - Host Firewall (
ufw): Strict firewall allowing only SSH (Port 22), HTTP (Port 80), and HTTPS (Port 443). - Nginx Reverse Proxy: Terminating TLS 1.3 encryption, serving public storage uploads, compressing assets with Gzip, and reverse-proxying application traffic to PHP-FPM on port 80/8080.
- Application Container (PHP 8.4-FPM): Multi-stage container running pre-compiled Vite frontend assets, OPcache bytecode caching, and optimized Composer autoloading.
- Data & Queue Layer: Internal Docker network connecting to Redis 7 for high-speed sessions/queues and MySQL 8 / SQLite with persistent disk volumes.
[ Incoming HTTPS:443 ]
         │
         ▼
[ Hostinger VPS Firewall (UFW) ]
         │
         ▼
[ Nginx Reverse Proxy & SSL ]
         │
         ├─── /storage/* ──────────▶ [ Persistent Public Disk ]
         └─── FastCGI (Port 80) ───▶ [ Dockerized PHP 8.4-FPM ]
                                           │
                                  ┌────────┴────────┐
                                  ▼                 ▼
                         [ Redis 7 Queue ]   [ Database ]
Step 1: Hostinger VPS Provisioning & Security Hardening
When provisioning your server inside the Hostinger hPanel dashboard, select Ubuntu 24.04 LTS (Noble Numbat) or Ubuntu 22.04 LTS. Once provisioned, note your server's Public IPv4 address.
1.1 Generate and Authorize SSH Keys
Avoid password authentication entirely. On your local development machine, generate an Ed25519 key pair if you haven't already:
ssh-keygen -t ed25519 -C "deployer@yourdomain.com"
Copy your public key to your new Hostinger server:
ssh-copy-id -i ~/.ssh/id_ed25519.pub root@<HOSTINGER_VPS_IP>
1.2 Create a Dedicated Deployer User
SSH into your server and create a non-root administrative user:
ssh root@<HOSTINGER_VPS_IP>

# Create deployer user with sudo privileges
adduser deployer
usermod -aG sudo deployer

# Copy SSH keys to the new deployer user
mkdir -p /home/deployer/.ssh
cp /root/.ssh/authorized_keys /home/deployer/.ssh/
chown -R deployer:deployer /home/deployer/.ssh
chmod 700 /home/deployer/.ssh
chmod 600 /home/deployer/.ssh/authorized_keys
1.3 Configure UFW Firewall
Lock down all inbound network ports except those explicitly required for web traffic and secure shell access:
sudo ufw default deny incoming
sudo ufw default allow outgoing
sudo ufw allow OpenSSH
sudo ufw allow 80/tcp
sudo ufw allow 443/tcp
sudo ufw --force enable
sudo ufw status verbose
Step 2: Install Modern Docker Engine & Compose Plugin
Rather than maintaining fragile PHP PPA packages and node version managers directly on the host OS, running containerized services ensures reproducible parity between development and production.
Install official Docker packages from Docker's official apt repository:
sudo apt-get update
sudo apt-get install -y ca-certificates curl gnupg lsb-release

# Add Docker's official GPG key
sudo install -m 0755 -d /etc/apt/keyrings
curl -fsSL https://download.docker.com/linux/ubuntu/gpg | sudo gpg --dearmor -o /etc/apt/keyrings/docker.gpg
sudo chmod a+r /etc/apt/keyrings/docker.gpg

# Setup the repository
echo "deb [arch=$(dpkg --print-architecture) signed-by=/etc/apt/keyrings/docker.gpg] https://download.docker.com/linux/ubuntu $(lsb_release -cs) stable" | sudo tee /etc/apt/sources.list.d/docker.list > /dev/null

# Install Docker Engine and Compose plugin
sudo apt-get update
sudo apt-get install -y docker-ce docker-ce-cli containerd.io docker-buildx-plugin docker-compose-plugin

# Allow deployer user to run docker without sudo
sudo usermod -aG docker deployer
Log out and back in as deployer to refresh group memberships.
Step 3: Production Multi-Stage Dockerfile
A production Dockerfile must compile frontend assets using Node, install production-only Composer dependencies, tune OPcache, and minimize final image size.
Here is the production-ready Dockerfile:
# ==============================================================================
# Stage 1: Build Frontend Assets (Node.js & Vite)
# ==============================================================================
FROM node:22-alpine AS frontend-builder
WORKDIR /app

COPY package*.json ./
RUN npm ci --prefer-offline --no-audit

COPY . .
RUN npm run build

# ==============================================================================
# Stage 2: Production PHP Runtime
# ==============================================================================
FROM php:8.4-fpm-alpine AS production

RUN apk add --no-cache \
    curl \
    libpng-dev \
    libjpeg-turbo-dev \
    freetype-dev \
    libzip-dev \
    icu-dev \
    oniguruma-dev \
    zip \
    unzip \
    git \
    linux-headers \
    $PHPIZE_DEPS \
    && docker-php-ext-configure gd --with-freetype --with-jpeg \
    && docker-php-ext-install -j$(nproc) \
        pdo_mysql \
        bcmath \
        gd \
        zip \
        intl \
        opcache \
    && pecl install redis \
    && docker-php-ext-enable redis \
    && apk del $PHPIZE_DEPS

# Install Composer
COPY --from=composer:2 /usr/bin/composer /usr/bin/composer

WORKDIR /var/www/html

# Copy application source
COPY . /var/www/html

# Copy pre-compiled Vite production bundle from Stage 1
COPY --from=frontend-builder /app/public/build /var/www/html/public/build

# Install production PHP dependencies
RUN composer install --no-dev --optimize-autoloader --no-interaction --prefer-dist

# Set correct production file permissions
RUN chown -R www-data:www-data /var/www/html/storage /var/www/html/bootstrap/cache \
    && chmod -R 775 /var/www/html/storage /var/www/html/bootstrap/cache

EXPOSE 9000
CMD ["php-fpm"]
Step 4: Docker Compose Orchestration
Create docker-compose.yml to coordinate the application, Nginx web server, Redis 7 caching/queues, and persistent storage volumes:
services:
  app:
    build:
      context: .
      target: production
    container_name: laravel_app
    restart: unless-stopped
    env_file:
      - .env
    volumes:
      - app-storage:/var/www/html/storage
      - app-database:/var/www/html/database/data
    depends_on:
      redis:
        condition: service_healthy
    networks:
      - app-network

  nginx:
    image: nginx:alpine
    container_name: laravel_nginx
    restart: unless-stopped
    ports:
      - "8080:80"
    volumes:
      - ./docker/nginx/default.conf:/etc/nginx/conf.d/default.conf:ro
      - ./public:/var/www/html/public:ro
      - app-storage:/var/www/html/storage:ro
    depends_on:
      - app
    networks:
      - app-network

  redis:
    image: redis:7-alpine
    container_name: laravel_redis
    restart: unless-stopped
    command: redis-server --appendonly yes
    volumes:
      - redis-data:/data
    networks:
      - app-network
    healthcheck:
      test: ["CMD", "redis-cli", "ping"]
      interval: 5s
      timeout: 3s
      retries: 5

networks:
  app-network:
    driver: bridge

volumes:
  app-storage:
  app-database:
  redis-data:
Step 5: Nginx Configuration & Storage Upload Handling
One of the most common pitfalls when deploying Laravel is uploaded images disappearing or returning 404 errors. When users upload avatars, rate cards, or article cover images, files are stored in storage/app/public/.
Your Nginx configuration must alias /storage/ directly to /var/www/html/storage/app/public/:
server {
    listen 80;
    server_name _;
    root /var/www/html/public;
    index index.php;

    client_max_body_size 64M;

    # Gzip Compression
    gzip on;
    gzip_types text/plain text/css application/json application/javascript text/xml application/xml image/svg+xml;

    # Crucial: Direct Alias for Uploaded Storage Media
    location /storage/ {
        alias /var/www/html/storage/app/public/;
        access_log off;
        expires max;
        try_files $uri $uri/ =404;
    }

    # Static Assets Caching
    location ~* \.(jpg|jpeg|png|gif|ico|css|js|woff2|webp)$ {
        expires 30d;
        access_log off;
        add_header Cache-Control "public, no-transform";
    }

    location / {
        try_files $uri $uri/ /index.php?$query_string;
    }

    location ~ \.php$ {
        fastcgi_pass app:9000;
        fastcgi_index index.php;
        fastcgi_param SCRIPT_FILENAME $document_root$fastcgi_script_name;
        include fastcgi_params;
        fastcgi_read_timeout 300;
    }

    location ~ /\.(?!well-known).* {
        deny all;
    }
}
Step 6: Host Reverse Proxy & Free Let's Encrypt SSL
To achieve clean SSL termination, install Nginx on the host machine as an edge reverse proxy:
sudo apt install -y nginx certbot python3-certbot-nginx
Configure /etc/nginx/sites-available/yourdomain.com:
server {
    server_name yourdomain.com www.yourdomain.com;

    location / {
        proxy_pass http://127.0.0.1:8080;
        proxy_set_header Host $host;
        proxy_set_header X-Real-IP $remote_addr;
        proxy_set_header X-Forwarded-For $proxy_add_x_forwarded_for;
        proxy_set_header X-Forwarded-Proto $scheme;
    }
}
Enable the site and obtain your SSL certificate:
sudo ln -s /etc/nginx/sites-available/yourdomain.com /etc/nginx/sites-enabled/
sudo nginx -t
sudo systemctl reload nginx

# Request Let's Encrypt SSL
sudo certbot --nginx -d yourdomain.com -d www.yourdomain.com
Certbot automatically schedules systemd timers to renew your certificates before expiration.
Step 7: Zero-Downtime Automated Deployment Script
To deploy future updates seamlessly, create deploy.sh in your project root:
#!/usr/bin/env bash
set -euo pipefail

echo "============================================================"
echo " Starting Zero-Downtime Deployment..."
echo "============================================================"

# 1. Pull latest code from Git
git pull origin main

# 2. Rebuild Docker containers
docker compose build --pull app nginx
docker compose up -d --remove-orphans

# 3. Wait for services to stabilize
sleep 5

# 4. Clear and warm Laravel caches
docker compose exec -T app php artisan storage:link --force
docker compose exec -T app php artisan migrate --force
docker compose exec -T app php artisan config:cache
docker compose exec -T app php artisan route:cache
docker compose exec -T app php artisan view:cache

# 5. Clean up dangling image layers
docker image prune -f

# 6. Verify health check
curl -f http://127.0.0.1:8080/up || exit 1

echo "Deployment completed successfully!"
Make it executable:
chmod +x deploy.sh
Whenever you push new features or fixes, deploying takes a single command:
./deploy.sh
Production Verification & Troubleshooting Matrix
| Issue Encountered | Root Cause | Instant Fix |
|---|---|---|
| 419 Page Expired (CSRF) | Missing or misconfigured trusted proxy headers behind Nginx. | Ensure AppServiceProvider or middleware sets Request::setTrustedProxies(['*'], ...) and APP_URL=https://yourdomain.com. |
| Uploaded Images 404 | Broken storage symlink or missing Nginx volume mapping. | Run php artisan storage:link --force and check location /storage/ alias matches the persistent container volume. |
| 502 Bad Gateway | PHP-FPM container is booting or exited due to a memory limit. | Inspect container output using docker compose logs -f app and ensure PHP memory limit is at least 256M. |
| Vite Manifest Missing | Frontend assets were not built during the deployment pipeline. | Ensure the multi-stage Docker build executed npm run build and copied public/build into the final container. |
Conclusion
With this architecture in place on your Hostinger VPS, your Laravel application benefits from:
- Bulletproof Isolation: Node, PHP, Redis, and database dependencies never conflict with system packages.
- Instant Rollbacks & Deployments: Automated Git pulls with containerized builds and atomic container swaps.
- Blazing Performance: Bytecode caching with OPcache, in-memory sessions with Redis, and static assets served with Gzip directly by Nginx.
By combining Hostinger's cost-effective VPS infrastructure with modern containerized DevOps practices, you get the performance and resilience of enterprise cloud deployments at a fraction of the cost.